In my 25 years with the US Army Special Operations, I learned a key lesson: always be ready. When emergencies hit, your survival kit can be the difference between safety and danger. It’s vital to know what to include and why.
This guide will show you how to make a survival kit that meets your family’s needs. This includes pets and seniors. We’ll cover the basics like water, food, and survival gear. This way, you’re ready whether you’re at home, work, or on the move.
This isn’t just about checking off a list. It’s about being truly prepared. Your kit should have more than just food and water. It should give you confidence to face any situation. FEMA says help is key after disasters, so it’s up to you to be ready until help arrives.
Let’s go over the must-haves for your survival kit. It’s your first line of defense in emergencies. History shows that being prepared can save lives when disaster strikes.
Key Takeaways:
- Understanding essential survival gear for emergency preparedness.
- Building a customized emergency survival kit that meets unique family needs.
- Maintaining a sufficient emergency supply of water and non-perishable food for at least 72 hours.
- Including personal protective equipment and sanitation supplies in your kit.
- Regularly updating and maintaining your emergency kit.
The Necessity of a Personalized Emergency Survival Kit
Creating a DIY emergency survival kit is more than just gathering water and canned food. It’s about making a reliable set of emergency essentials for you and your family in disasters.
Understanding the Basics of an Emergency Kit
The core of a good survival kit items list includes water, food, a radio, flashlight, first aid kit, batteries, a whistle, and sanitation supplies. But, there’s more to it.

Tailoring the Kit to Your Specific Needs
To make your emergency survival kit truly useful, think about your location and family size. Add items like prescriptions, pet supplies, cash, and important documents. This makes a big difference in emergencies.
Here’s a list of key items to consider:
| Essentials | General Use | Tips |
|---|---|---|
| Water (one gallon per person per day) | Drinking, hygiene | Store in a cool, dark place; avoid past expiry dates |
| Non-perishable food | Three-day to one-week supply | Note expiration dates for timely replacement |
| Battery-powered radio | Emergency updates | Include extra batteries |
| Water filters | Purification (e.g., LifeStraw) | Travel-friendly and treats up to 1,000 gallons of water |
| Custom items (e.g., N95 masks, first aid kits) | Health and safety | Factor in special health requirements and safety measures |
By making these emergency kit checklist changes and checking your kit often, you’ll be ready for any disaster. Your kit will support your household’s specific needs.
Water: The Essential Element of Survival
Creating an emergency survival kit is crucial, and water is key. It’s the most important resource. You need enough water in your kit to stay safe.
Let’s explore how to store and purify water. This way, you’ll always have safe drinking water, no matter what.
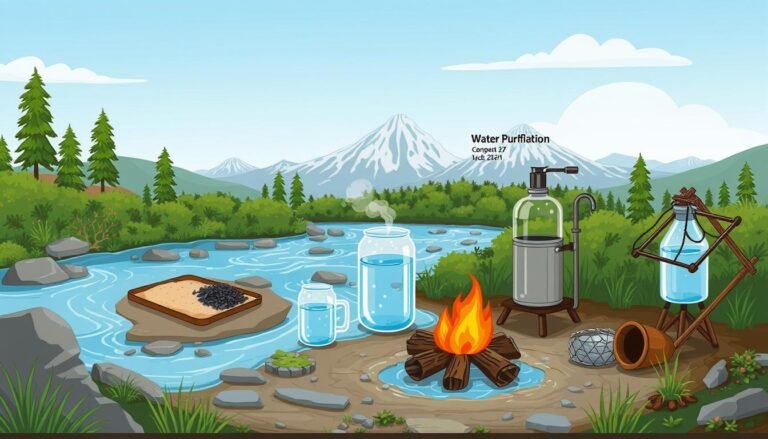
How to Store and Purify Water
Start by using clean containers for water. Choose plastic or glass. FEMA suggests storing one gallon of water per person per day for three days.
For longer emergencies, aim for a two-week supply. That’s 14 gallons per person. Purifying water is also vital. Boiling is safest, or use unscented bleach or calcium hypochlorite.
Keep your water in a cool, dark place. This helps it last longer and stay clean.
Calculating Daily Water Needs
Figuring out your water needs is more than just following rules. Think about the weather, your health, and how active you are. In hot weather or when you’re very active, you’ll need more water.

To be fully prepared, think about how long your water will last. Use airtight containers and change the water every six months to a year. For the best, use water pouches that last up to five years and can handle tough conditions.
By following these steps, you’ll make your family much safer in emergencies. Water is a key part of your survival kit.
Essential Non-Perishable Food Items for Your DIY Emergency Survival Kit
Creating a DIY emergency survival kit is key. It needs the right non-perishable food to keep you and your family going. Knowing what to include can really help you prepare.
When making your survival kit, add a mix of non-perishable food that lasts for days. These foods don’t spoil easily and are easy to prepare. They’re a big help when things get tough.
- Dried fruits and nuts
- Canned vegetables and fruits
- Energy bars and protein bars
- Ready-to-eat canned meats
- Dry staples like rice, beans, and pasta
Make sure your kit has foods that give you proteins, fats, and carbs. This mix keeps your energy up.
Don’t forget to include water. Aim for one gallon per person per day. You might need more for cleaning and cooking.
| Food Item | Quantity | Caloric Value | Shelf Life |
|---|---|---|---|
| Jar of Peanut Butter | 1 | 2,575 calories | 2 years |
| Canned Black Beans | 4 cans | 1,080 calories | 2-5 years |
| Rice | 6 pounds | 10,080 calories | 5 years |
| Box of Pasta | 2 boxes | 3,200 calories | 2 years |
Adding these items to your kit helps you stay safe in emergencies. A manual can opener is also key for opening canned goods. It shows the importance of tools for survival.
Check your supplies often to keep them fresh. This is especially true for medicines and other items that can spoil. Being well-prepared can help you survive tough times. It shows how vital a good survival kit is.

Creating an Emergency Light Source: Flashlights and Alternatives
When making a disaster survival gear list, reliable emergency lights are key. They help during power outages and are essential emergency supplies. Having different light sources, including DIY options, can be very helpful.
Choosing the Right Flashlights and Batteries
Choosing the right flashlights and batteries is important. LED flashlights are durable and last longer. Look for flashlights with adjustable settings to save battery life. Update your emergency supplies regularly to keep them ready.
Understanding the Lifespan of Flashlight Batteries
It’s important to know how long your flashlight batteries last. Charge them at the right rate for their capacity. Keep them charged between 6.75V to 7.5V for best performance.
Now, let’s explore some affordable and creative flashlight alternatives for your disaster survival gear:
| Light Source | Description | Duration | Cost-Effectiveness |
|---|---|---|---|
| Crisco Candle | Uses natural fiber wick inserted in Crisco | Up to 30+ days | High |
| Makeshift Oil Lamp | Made from everyday items like Mason jars and olive oil | Variable | Medium |
| Crayon Candle | Creates a quick light source using a crayon as a wick | Up to 30 minutes | Low |
| Makeshift Olive Oil Lamp | Uses sardines in olive oil for a durable light | Many hours | Low |
| Plastic Jug Lamp | Water-filled jug with a headlamp for diffused light | Depends on headlamp power | Medium |
In conclusion, having various light sources is key to emergency preparedness. Flashlights are a must, but exploring other options can add to your readiness for unexpected situations.
Health and Safety: Assembling a First Aid Kit
Building an emergency survival kit means keeping yourself and others safe. A well-stocked first aid kit is key. It’s the heart of your emergency plan. I’ll show you how to make a first aid kit that meets your needs.
Important First Aid Essentials
Start with the basics in your survival kit. You’ll need bandages, antiseptic wipes, and gauze pads. Medical tape and antibiotic ointment are also must-haves to prevent infection. Don’t forget pain relievers for adults and kids to handle pain and fever.
For serious injuries, include splints and tourniquets. These are crucial for severe wounds.
Customizing Your First Aid Kit
Make your kit personal by adding what you need. Include prescription meds in their original bottles. If you wear glasses or contacts, add extras. For severe allergies, an EpiPen is a lifesaver.
Don’t forget reflective gear like vests and triangles. They help you stay safe by making you more visible at night or on the side of the road.
| Category | Essential Items | Suggested Quantity |
|---|---|---|
| Medical | Adhesive bandages, Gauze, Antiseptic wipes, Antibiotic ointment, Medical tape | Multiple units per type |
| Pain Management | Pain relievers (Adult & Child) | 20-30 doses each |
| Chronic Conditions | Prescription medications, Eyeglasses | As needed |
| Allergy Aid | EpiPens | 1-2 units |
| Safety Enhancements | Reflective vests, Safety triangles | 1 per kit |
Choose items for your first aid kit based on your health needs and possible situations. Being prepared is not just about being ready; it’s about survival. Remember, in an emergency, your kit’s quality and readiness can make a big difference.
DIY Emergency Survival Kit: Essential Tools and Gear
Having the right tools can be a lifesaver in emergencies. Whether you’re a seasoned prepper or just starting out, knowing what to include in your emergency kit is key. We’ll explore the essential tools and navigation gear you need for any unexpected situation.
Multi-Purpose Tools for Survival
Choosing multi-tools is smart when space and weight matter. These handy devices offer many functions in one. Think of a Swiss Army knife or a Leatherman multi-tool, which can cut, open bottles, and more. Make sure to include a good multi-tool in your kit for repairs and food prep.
Navigational Equipment for Orientation
Reliable navigation tools are a must in any emergency kit. A physical map and compass are perfect when digital devices fail. They help you stay oriented during hikes or evacuations. Keep your maps current and cover areas you might need to travel to.
A whistle is a simple yet crucial tool for signaling help. Also, include signal mirrors and flares to attract rescuers during the day or night.
Here’s a table to help you build your emergency kit. It includes the survival and navigation tools you’ll need:
| Item | Type | Purpose | Details |
|---|---|---|---|
| Swiss Army Knife | Multi-Tool | Multiple uses including cutting, screwing, can opening | Portable, durable |
| Compass | Navigation Tool | Orientation | Precision navigation |
| Local Maps | Navigation Tool | Locating routes and safe zones | Updated and waterproof versions preferred |
| Emergency Whistle | Survival Tool | Signaling for help | Loud, distinct pitch |
| Signal Mirror | Survival Tool | Signaling and personal hygiene | Lightweight, reflective |
With the right tools, you’re better equipped to handle emergencies. They help you survive and stay comfortable until help arrives. Remember, being prepared starts with a well-thought-out emergency kit.
Shelter and Comfort: Survival Gear for Harsh Conditions
Preparing for unexpected events is key. This includes natural disasters or extreme weather. A good disaster survival kit gives you peace of mind and essential survival tools.
Choosing Durable and Efficient Shelter Materials
Building a strong emergency shelter starts with the right materials. Heavy-duty plastic sheeting, tarps, and duct tape are must-haves. They can quickly turn into a solid shelter, keeping you safe from the weather.
Packing for Warmth and Protection
Survival clothing is vital for any emergency plan. Start with a breathable base layer to keep moisture away. Add more layers for insulation and warmth. An emergency blanket is also crucial; it’s small but keeps you warm.
Make sure each family member has their own survival bag. This bag should have a blanket, clothes for the weather, and small comforts like wool socks and gloves. These items help keep you warm.
It’s important to check your emergency kit often. Update it for seasonal changes and new survival gear. This ensures you’re always ready for any disaster.
In short, a well-stocked disaster survival kit is essential. It includes shelter, clothes, and blankets. This kit helps you stay comfortable and safe during tough times. It’s not just about surviving; it’s about staying comfortable and keeping your spirits up.
Emergency Preparedness for Sanitation and Hygiene
When disaster hits, keeping clean is key for staying healthy. We’ll talk about important items for your emergency kit. These help keep you clean and safe from germs.
Sanitation Supplies to Maintain Cleanliness
Good sanitation is vital in emergencies. You’ll need:
- Moist towelettes for cleaning hands and surfaces
- Heavy-duty garbage bags with ties for waste and to keep areas clean
- Disinfectant wipes and sprays for cleaning tools and surfaces
Having these items ensures a clean space during tough times.
Personal Hygiene Products to Include
Keeping clean is crucial to avoid getting sick after a disaster. Make sure your kit has:
- Soap and hand sanitizer to fight germs
- Toothbrushes and toothpaste for clean teeth
- Feminine supplies for dignity and hygiene
These items help you stay clean and healthy, boosting your ability to cope.
Having a detailed emergency checklist with these items is smart. It helps you stay prepared and maintain dignity, even in hard times.
| Item Category | Examples | Importance |
|---|---|---|
| Sanitary Products | Moist towelettes, Garbage bags, Disinfectant wipes | Essential for cleanliness and preventing infections |
| Personal Hygiene Products | Soap, Toothpaste, Feminine supplies | Crucial for maintaining personal hygiene and comfort |
Being ready for emergencies by keeping clean is important. It helps your health and ability to handle stress. Choosing the right items and adding them to your checklist is crucial for your safety and recovery.
Communication Tools for Staying Informed and Connected
Keeping in touch during emergencies is key for safety and updates. This part looks at the best ways to stay connected. It focuses on reliable emergency communication, effective survival signaling, and useful two-way radios.
Radio Options for Emergency Updates
Emergency radios are a must-have in any emergency kit. AM/FM radios and NOAA weather radios are great for getting news and alerts. AM/FM radios are cheap and work well when the power is out.
NOAA radios are all about weather forecasts and emergency alerts. They have a battery backup, so you can get updates even when there’s no power.
Charging Devices for Maintaining Communication
Keeping devices charged during a long power outage is tough. Add solar chargers, hand-crank chargers, or battery packs to your kit. These tools help keep your two-way radios, smartphones, and other devices working. This way, you can stay in touch with others.
| Device Type | Description | Key Benefit |
|---|---|---|
| AM/FM Radio | Battery or hand-crank powered radio for receiving broadcasts | Accessible and reliable for news and public announcements |
| NOAA Weather Radio | Broadcasts weather forecasts and alerts | Specializes in emergency notifications with battery backup |
| Two-Way Radios (FRS/GMRS) | Short to medium range communication devices | Essential for immediate contact with family or groups |
| Solar Charger | Device charging through solar energy | Ensures device operation during power outages |
Having a solid emergency communication plan is more than just having the right tools. It’s also about checking they work and teaching everyone how to use them. Make sure to include these tools in your emergency kit. This will help you stay safe and prepared when it counts.
Additional Supplies: Personalizing Your Emergency Survival Kit
Creating a personalized emergency survival kit is key. It must meet the unique needs of each family member, including pets and babies. This customization boosts safety and comfort during emergencies. Let’s look at some must-have items you might not have thought of.
Considerations for Children, Elders, and Pets
It’s vital to include disaster preparedness essentials for all ages and pets. For kids, baby emergency needs like diapers and baby food are a must. Seniors might need more medication, and pet emergency supplies like extra food and a leash are crucial for their safety.
- Baby wipes and pediatric medications for children.
- Extra glasses or hearing aid batteries for elders.
- Carrier and calming aids for pets.
Entertainment to Reduce Stress and Maintain Morale
Being in a shelter for long can affect mental health. That’s why adding entertainment items is important. Books, cards, or puzzle games can distract from the crisis. They bring a sense of normalcy and lower anxiety.
- Board games and coloring books for kids.
- Books or magazines for adults.
- Chew toys or small, engaging play items for pets.
In summary, customizing your emergency kit with items for children, elders, and pets, plus morale boosters, greatly improves your readiness for disasters. Regularly check and update these kits to ensure they’re ready when disaster strikes.
Maintaining and Updating Your DIY Emergency Survival Kit
Keeping a survival kit up to date is crucial. It should match the latest safety standards and your personal needs. Changes in weather, personal life, or time can make your kit outdated. So, it’s important to check and update it regularly.
Regular Checks and Replacements
Updating emergency supplies is key to avoiding bad items in critical times. Check food expiration dates and replace them when needed. Having a three-day supply of non-perishable food is recommended.
Also, test and replace batteries in flashlights. Make sure all electronic devices in your kit work well.
Medical supplies in your kit need regular checks too. If you take prescription medicine daily, update your kit’s medications. Non-prescription items like pain relievers should also be current. Tools like the LifeStraw Personal Water Filters should be checked for functionality and replaced if needed.
Assessing and Adapting to New Emergency Protocols
Staying updated with emergency protocols is vital for your family’s safety. This might mean adding new supplies based on research or local advice. For example, you might include pandemic items like masks and sanitizers.
Adding gadgets like the Amerelle Power Failure Lights, priced at $29.99 on Amazon, can also be helpful. These lights turn on automatically when the power goes out.
Experts at SafeWise recommend having kits at home, work, and in vehicles. Check your kit’s contents annually to stay prepared. This also helps in survival drills to test your plans.
| Item | Description | Location | Price |
|---|---|---|---|
| LifeStraw Personal Water Filter | Essential for water purification | Emergency Kit at home and in vehicles | $19.95 |
| Amerelle Power Failure Lights | Activates automatically during power outages | Throughout home and office | $29.99 |
| Wise Company Emergency Food Supply | Long shelf-life food supply | Pantry storage at home | $111.59 |
The success of your DIY emergency survival kit depends on its maintenance. Keeping it updated with the right supplies boosts your family’s safety against emergencies.
Diverse Storage Solutions: Where to Keep Your Survival Kit
Preparing for emergencies by organizing and storing an emergency kit is crucial. The way we store our emergency supplies greatly affects our readiness. Whether at home, at work, or on the road, being prepared is key.
Home Storage Strategies
An emergency kit for home should be easy to access. Place it near an exit or in a designated closet. Use categories like First Aid/medical essentials, emergency light sources, and water purification for quick retrieval.
Consider using hooks in storage closets for hanging bags. Add a third shelf for bulky items. This organized approach helps you grab essentials quickly, which is vital for evacuations. Use containers or separate backpacks for different categories to ensure nothing is forgotten.
Workplace Emergency Supplies
Having workplace emergency supplies is vital, especially in disaster-prone areas. A compact yet comprehensive emergency kit in your office can protect you until help arrives. Include water, non-perishable snacks, a small first aid kit, and comfortable shoes for long walks.
Car Emergency Kit
A car emergency kit should have everything for being stranded. Include first aid supplies, water, energy snacks, a flashlight, and a LifeStraw Personal Water Filter. This filter, available on Amazon for $19.95, ensures clean drinking water anywhere. Your car kit can be a lifesaver in breakdowns or snowstorms.
| Emergency Supply Category | Tips for Storage | Example Products | Price |
|---|---|---|---|
| First Aid/Medical | Use a small, easily accessible bag | Surviveware Small First Aid Kit | $49.99 |
| Emergency Food | Store in cool, dry place | Wise Company Emergency Food Supply | $111.59 |
| Emergency Light | Include in all kits; check battery life regularly | Amerelle Power Failure Lights | $29.99 |
| Water Purification | Include multiple methods | LifeStraw Personal Water Filter | $19.95 |
| Survival Tools | Include multi-use items like paracord | TOUGH-GRID Paracord | $35.97 |
By categorizing and organizing your supplies, you can check them regularly for expiries. Make sure all family members or co-workers know where they are stored. This way, you’re better prepared for any emergency. Don’t delay setting up your emergency kits—it’s your first step toward safety and peace of mind.
Building a Survival Kit on a Budget: Cost-Effective Prepping
Being a seasoned prepper doesn’t mean you have to spend a lot. You can be smart and still keep your family safe. By focusing on budget emergency preparedness, you can make a DIY emergency kit that’s affordable and effective.
Finding Deals on Essential Supplies
Start by smart shopping for essential items. Look for discounts on non-perishable food, water, and first-aid kits. Dollar stores and discount retailers often have great deals on basic items like bandages and antiseptic creams.
Also, keep an eye out for sales on canned goods and bottled water. These items are often cheaper during holidays or emergency preparedness months.
Buying store brands for things like aspirin or ointment can also save you money. These products are often cheaper but still effective. Remember, you don’t need to spend a lot to be prepared.
Diy Alternatives to Commercial Products
Making your own DIY emergency kit can save money and boost your self-sufficiency. For example, you can make a water filter from sand, charcoal, and a plastic bottle. It’s just as good as buying one.
Learning to make DIY fire starters from lint and wax can also be a lifesaver. Making these items yourself not only saves money but also teaches you valuable skills. It makes preparing for emergencies fun and educational.
In conclusion, finding affordable survival kits is easier than you think. By watching for sales, choosing store brands, and getting creative, you can prep without breaking the bank. Cost-effective prepping is not only possible but also rewarding.
Preparing for emergencies doesn’t have to be expensive. With the right approach and a little creativity, you can keep your family safe without spending too much. It’s all about being smart and resourceful.
Conclusion
I’ve shown you how to make a reliable emergency survival pack. It’s possible to do this affordably and thoroughly. Building a DIY kit is about being ready for the unexpected. For under $100, you can create a kit that’s all your own.
With just $20, you can get a good first aid kit. You can also get a LifeStraw for clean water. The Amazon Basics 10-in-1 multi-tool, which costs about $20, adds a lot of value to your kit.
Remember, your emergency pack is more than just stuff. It shows you’re aware of dangers and care about your safety. It’s important to keep your kit updated and tailored to your needs.
Adding non-perishable food, reliable flashlights, and duct tape are key. These items help you face emergencies head-on. They give you a solid defense against unexpected events.
My tips aim to help you build a kit that fits your life. Whether it’s for peace of mind or real emergencies, this guide is here to help. Starting your kit might take some thought and money, but the peace of mind it brings is worth it.
Always think, plan, and prepare for emergencies. This way, when they happen, you and your loved ones will be ready. You’ll have everything you need to get through tough times.